Tag Archives: Do it yourself

Hardcover Bookbinding – The Gravity Press

Photo of gravity press

The Very Practical Gravity Press

Always full of creative ideas and short of cash, I tend to seek less expensive, but practical ways to do things. So when I took up bookbinding, I outfitted my small bookbinding lab with a mix of tools I found around the house, at garage sales, the hardware and the dollar store. I also designed and built most of my equipment where possible.

Punching Cradle2

This punching cradle is made from fiber board. The template is a piece of aluminum angle with evenly spaced holes.

It is easy to drool over the shiny brass and exotic hardwood bookbinding tools you find on the internet. There is something about the feel of a quality handmade tool. It’s a feeling of empowerment, of confidence that with this tool you can do first-rate work. You can even make excuses, reasons that you must have a certain tool in order to improve upon your craft.

6x9 Stitching Frame

My home made 6×9 stitching frame

But seasoned crafters know it is not the tool that makes the difference so much as the hand that guides it. A good craftsperson is aware that there are multiple ways to accomplish most any task, from design, to cutting, to fitting and gluing. So it is with bookbinding.

One of my best tool innovations is the gravity press. This idea, while not original, has some very big advantages over a traditional book press. The first, of course, is the low-cost. This is because almost anything handy will do for the main functioning element of the press. You can use lead, steel, concrete, sand, beans, sawdust or about anything that can be cut in blocks or contained in a sack. I use bricks (wrapped in paper to avoid unnecessary abrasions and dust).

I also use a series of flat, thin fiberboards cut to various sizes to assist in the various clamping operations. They are used to distribute the weights evenly over a given area. By stacking the bricks I can apply a wide range of pressures anywhere I need to.

Gluing Headbands

Using bricks to hold spines upright for gluing headbands

Another advantage is that I can replicate the clamping setup so that I can perform similar operations on a number of projects at the same time. I can easily vary the size, position and pressure as needed.

I use some form of gravity press when gluing end papers onto the bookblock. A light weight distributed along the glue line will hold everything together for the short time it takes the glue to set.

I sometimes use bricks to hold a number of bookblocks for gluing the headbands to the spines at once.

Improvised nipping press

Improvised nipping press using dowels.

But the most useful application of a press when crafting a book is to compress the finished piece in order to help to form the hinge joint, and to ensure that the book finishes flat. This is sometimes done with the aid of a nipping press, but can be accomplished with the gravity press just as effectively. Knitting needles or dowels laid lengthwise can be used to take the place of the rigid metal edges on a nipping press.

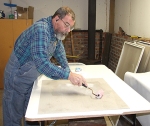
Another good use of the gravity press is to help flatten materials with a curl in them. For porous bookboards, I will sometime mist them with water to relax the fibers and place them under a flat board with bricks distributed evenly. Multiple boards may be stacked with wax paper between them to prevent sticking. Drying overnight in this way usually eliminates any tendency for the boards to curl afterward.

Photo of curled bookboard

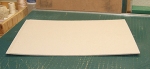
Bookboard with a curl

Misting Bookboard prior to gluing

Misting bookboard prior to gluing

I have a small stock of these laminated boards made up that have been allowed to equalize according to the ambient room temperature and humidity. In other words, they lie flat before I will use them to construct covers or boxes.

Gluing Out Bookboard

Glue both surfaces

Two thin boards can be laminated with the grain perpendicular to one another and placed in the gravity press to make thicker boards with less tendency to curl. It helps to mist these boards too, before gluing. I use two pieces of .065″ Daveyboard to make a strong 1/8″ laminated bookboard.

Marrying two plies

Assemble plies with opposing grain direction

Using a roller, work the glue out to an even coating on the dampened board. Coat both surfaces to be joined. Align the edges, making sure the grain is at cross purposes to each board and press together using your hands. I recommend using a brayer to roll over the joined boards thoroughly to ensure good contact.

Flat Board against plies

Place a flat board on top.

Lay the glued sandwich on a flat surface and place a flat piece of fiber board on top. Distribute weights evenly across the surface and allow the boards to dry for several hours. You may be able to speed this process up, depending on the temperature and humidity of your work area. I like to let mine cure overnight.

This method will produce a good, stiff board suitable for larger or more substantial covers. Even so, I often find that in a few hours after removal from the press, boards laminated in this manner will sometimes tend to exhibit an undesirable curl when completely dry. When this happens, I will physically massage (or bend) the board to get it to lie flatter.

Distribute weights evenly on top of flat board.

Distribute weights evenly on top of flat board.

By bending the board while it is dry, the tight fibers will stretch. Then I mist the stubborn board again and leave it in the gravity press usually overnight. It is best to prepare your book boards well ahead of time to be sure that they will lie flat when you you need them.

When using water-based glues to adhere bookcloth, the boards will become damp again, but only on one side. This will cause the boards to curl as the glue cures. However, this effect can be offset by misting the other side with water and then placing the cover under the press until the glue cures.

Attaching Bookblock

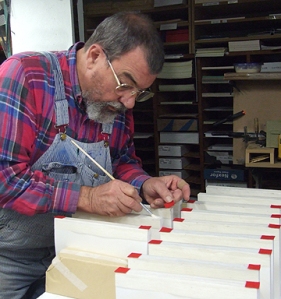
Carefully gluing the super with a minimal amount of glue.

Sometimes I find the end sheets are too delicate or thin to use PVA glue to adhere the sheet to the inside cover. For these types of papers I find it much more practical to use transfer adhesive instead.  The bookblock is mounted onto a nice, dry flat cover with a minimal of glue used to adhere the flap of super to the raw daveyboard. The wax backing is peeled from the adhesive-backed endsheets and carefully pressed into place. The last step is of course, to place the book in the gravity press until it is dry.

More about making endsheets or endpapers in a future post. Until then, happy holidays!

P.S. I sure would like to see some comments and suggestions from you bookbinders out there. Maybe you can give me some tips on how to make my bookbinding projects easier and/or better.

Mike riding backwards on bicycleMichael A. Faris
mfaris1950@gmail.com

Bookbinding – DIY Marbled End Papers

Lately I  have been experimenting with end papers, the sheet that is pasted to the inside cover when binding books.Endpapers or endsheets serve a number of purposes, the most important being to help connect the cover to the signature block. It also covers the more substantial mull flap that actually does the job of securing the text to the cover. In some cases, the endpaper is used to mask side stitches or oozing glue.

The secondary purpose of the endsheet is decorative.  It is usually made of something other than the text paper. Handmade or painted papers are common.

I tend to favor a more substantial sheet with stiffer properties. Thin papers present problems when pasting them onto the bookboard. They tend to tear more easily during assembly. In use, thin papers make for a weak hinge joint that will eventually fail.

Since only two papers are needed per book, the additional expense of a better sheet is trivial. Even handmade papers are affordable for the purpose. You can even add color or designs using your inkjet printer.

Image of real marbled paper

Marbled paper – A chunk of the real stuff.

Ahh! But marbled paper! That’s the stuff!  Fascinatingly beautiful marbled endsheets. Hand marbled papers are exclusive, that is, no two are exactly alike. Mastery of the technique takes time and patience, but the results are outstanding.

I Googled marbled paper images and studied them carefully. I saw basically two types, a more or less repeated pattern of loops, and a random swirly version that actually looks like real polished (stone) marble. I researched the process enough to develop an appreciation for the effort it takes.

If you are really a rough ‘n ready do it yourselfer, you can try marbling your own paper. The process is time consuming, messy and a little spendy.

But I’m an old printer, and my tendency is to look for a way to get the same effect digitally. I naturally tried to simulate the beautiful peacock’s tails and marble-like swirls on the computer. I am fairly adept at Adobe’s Photoshop and Illustrator. I thought surely I could come up with something that would work.

image of Maharaji Paper

My own Maharaji Paper! Made in Photoshop.

“Work” was the magic word here. I tried starting with a pallet of colors sprayed in a sort of soft rainbow. None of Photoshop’s stock filters produced the desired effect. So I imported my rainbow to Illustrator and dinked with the tools I found there. I got some very interesting results, but nothing even came close to the marbled look I was striving for.

Next, I tried making a series of hard-edged circles and shapes, and then applying the various filters and experimenting with the different drawing tools… with only marginally better results. Each time I tried, I developed a better appreciation for the the art form. It was easy to become discouraged.

But then I tried working with photographs as a base.

Photo of Brick Wall

Original Image of brick wall

Using a picture of a brick wall, I used the liquify filter and a small size brush. By experimenting with the brush size, density and pressure, I was able to get the effect I was after.

Marbled brick image

Brick wall after applying liquify effects in Photoshop

It takes a lot of time and patience to simulate marbling in Photoshop, as the “comb” used only has a single point, in contrast to the multi-toothed combs used by the true marbling artisan.

This means you have to drag it multiple times in order to achieve the same results. I would painstakingly make a single stroke and possibly delete it and try again. Each time I liked the effect I would save it. In this way I finally fell into an acceptable rhythm of strokes and the process became easier.

I was able to work the image to my satisfaction by taking my time. I came up with a pattern that reminded me of the old Checkmate TV series in the 50’s (for you old fogies out there). It looked like swirling liquid candy to an eight year old kid.

enlarged section of brick marble

Enlarged section of brick-marbled paper

I saved several versions, each with a different overall look. By manipulating the colors using the hue pallet in Photoshop, I was able to generate and save several different colored versions using the same basic pattern.

Photo of Climatis and chives.

Original photo of Climatis and chives.

I produced a number of interesting patterns using a combination of tools and effects in both Photoshop and Illustrator. Exactly how I did it makes no difference. The point is that with a little clicking around, you can generate your own patterns, using pictures, drawings or any number of colored shapes using a drawing or photo program on the computer.

The next image I used was a photo of a purple climatis. Using the same tool, I tried to achieve the peacock swirls. To do this, I soon discovered that my strokes had to be more uniform and less random. It took significantly longer to produce this one and I was not as pleased with the effect.

Image of Climatis and chives with liquify filter applied

Climatis and chives with liquify filter applied

I would like to see someone develop a tool to be added to the liquify filter in Photoshop, one with several points to be dragged at time. This technique could be really interesting if it was applied to other colorful subjects such as an American flag or a circus clown.

Image of Climatis + Chives (marbled) closeup

Climatis + Chives (marbled) closeup

I had some of these patterns digitally reproduced on an ivory colored 100# Parchtex cover. I made full 12×18 images using these patterns so that I could make endpapers for any size book that I was likely to bind. I also did a job where I used one of these patterns on a gloss white stock with good results.

One advantage of making your own patterns and printing them digitally is that you have full control of the scale and colors, making your options practically limitless.

Do you know of a way to make interesting patterns for endpapers? I would welcome some advice on how to simulate real old fashioned marbled paper using digital tools. Show me your work. Let’s share some ideas. Make a comment.

Until next time,

Michael

image of 4 Different Marbled Brick Colors

Four different colors generated from the same pattern.

Binding Better Books

Photo of hand-bound book

Over the years I have experimented with a lot of different ways to bind books. After learning to bind flat sheets with glue using the perfectbinding process, I moved on to more advanced methods involving folding and stitching signatures and attaching them to hard covers. Casebinding is a great way to add beauty and durability to books, and to protect the pages from unnecessary wear in normal handling. These sturdy and handsome books just feel really good to hold and to read. The coptic stitching and casebinding processes are lengthy compared to softcover perfectbinding, but the results are far superior.

Closeup photo of arched spine

Detail showing arched inner spine

A properly made book of this type should lay open easily without damage to the spine, and of course, close satisfactorily and remain so. The inner spine should form an arch, bending away from the case, allowing the leaves to lay over to either side.

Diagram of nested pages

Four sheets of paper nest to make a 16-page signature

Planning the text layout is the first step in building a book. Beyond all the regular page conventions regarding margins, gutters, type selection and formatting to position the text properly on each page, the layout must be imposed for the press sheet. This process locates each page so that when the press sheet is folded down into signatures, the pages are ordered properly. Four-page signatures are easily accommodated in most word processing programs by use of a booklet utility, which will order and position the pages automatically. Eight or more pages per signature are usually handled by the digital printer with special imposition software.Sixteen-page signatures are the most common, consisting of four sheets of paper inserted within each other. However, any number divisible by four will work.

Diagram of stacked 16-page signatures

Ten 16-page signatures stack to make a 160 page book

The signatures are stacked and stitched into place next to each other by any of several methods. Coptic stitching binds the pages to each signature and the signatures to each other to create an assembly called the text block. The text block is glued to a flexible mull with wings that will attach to the cover boards.

Photo of comparison between round and square backs

Flat vs. round backs

There are basically two kinds of spines: flat and rounded. The rounded spine is more traditional and was developed to reduce the added bulk offered by the cord used to stitch the signatures. The additional spread is fanned out at the spine, resulting in a book that is more uniform in thickness. The flat type, sometimes known as smyth sewn, utilizes finer thread and more stitches to overcome the same problem. Either method results in a durable binding that will stand up to normal usage for many years.

If you decide to bind your own books, a lot of your time will be invested in doing so. If you value your time, it only stands to reason that you should use the very best materials that you can lay your hands on. However, I would suggest that the beginner start with anything they can get for the purpose of learning. Good stitching technique takes practice. I know I made at least ten books from start to finish before I had anything that I was unashamed to show. My first efforts were crooked, too tight on one end or too loose. I missed stitches and tore out holes. I had big nasty knots that bulged at the spine, and my books didn’t open or close properly.

But now, with thousands of stitches behind me, I can say they are looking quite respectable. It takes time and patience to get it right. Learn when and where to tug on the thread, and how hard to pull so that it is just snug. Concentrate on consistency so that your stitching looks even and orderly. I spent a lot of evenings in a comfortable chair stitching signatures and listening to a TV or radio program.

Photo of stitching frame

Home-made stitching loom for Coptic stitching.

During this sojourn into stitching signatures, try out different types and weights of thread, different needles and spacing between stitches. Check out the difference between using waxed vs. unwaxed thread.  Read up on the various methods of stitching with cords or bands. Try your hand at ethiopian coptic stitches or try to emulate smyth sewing.  Any of these methods will produce good books. It is really only a matter of choosing the way you are most comfortable with and then practicing until you get it right.

I like waxed thread and stitching with bands made from scrap bookcloth. For my 6×9 journals I use three bands each 1.25″ wide. I punch eight holes into four sheets at a time making sixteen page signatures. I use the kettle stitch on each end and loop through the cross stitch over each band to tie the signatures together. I keep my stitches snug by tugging parallel and tight to the spine at the end of each course.

Endsheets go before and after the textblock. One leaf is glued to the cover board and folds to make the first and last loose pages. They serve as hinges between the cover and the pages.  Although many bookbinders will add the endsheets afterward using glue, I prefer to stitch my endsheets to the textblock.

Photo of first PVA application

Applying first coat of PVA

When the assembly and stitching of the textblock is complete, I apply a single coat of PVA cement over the threads and between the signatures at the spine, making sure that the block is nice and square and not twisted.

Photo of rounding the spine

Gently rounding the spine

Once the PVA has set up a bit (not tacky, but still workable), I round the spine by pinching the textblock and hammering lightly along the seams, driving the outside pages slightly away from the center ones. By gently working the spine alternately from side to side using the hammer and your hands, the spine takes on a rounded appearance, and the leaf side opposite the spine has a marked concave shape to the block.

I work the block until it is almost to the desired shape, but yet a little flat, and at this point I choose to trim the three sides on the guillotine cutter.  I then finish rounding of the spine, which results in a much shallower concave profile on the leaf side. Alternately, I could round the spine completely before trimming in order to produce a flat result.

Photo of headband as it is glued to the bookblock

I made a pseudo headband using a Post-It note wrapped around a piece of twine. The clamp is used to help maintain the spine’s shape as the glue is applied.

Photo of comparison between rounded and flat spines

Rounded and square bindings

When the spine is rounded and the block trimmed to my satisfaction, I apply another coat of PVA. To this I add the mull and attach decorative headbands. A final coat of PVA is applied over the entire spine and allowed to dry completely. I should mention here that up until now a lot of effort is made to ensure that the textblock is shaped properly. If it is not cut squarely or is lopsided it will be impossible to correct beyond this point.

Spine laminates and bookboards

The cover base is made from davey board and construction paper. I cut my boards the same width as the nominal page width and 3/8″ taller. The spine width is determined by holding the boards in place and wrapping a piece of paper around the spine. Score the paper by running a fingernail along the edge of the boards. Transfer this measurement to two pieces of construction paper and score them similarly. I made a jig for forming a round spine by gluing the two pieces together around a piece of PVC pipe inset between two boards. I assemble the two pieces of scored construction paper with PVA between, working them until they form tightly around the curve of the jig. You will have to experiment a little to find the right size pipe and inset specs to make it work for your book, or if you are a competent scrapbooker and crafter, you can just form the sandwich by hand and eyeball it to get the right shape.

Photo of rounded spine jig

Rounded spine jig for laminating

Photo of trimming the laminated spine

Trimming the laminated spine

Trim the wings from the bottom layer so that only one pair extends to approximately 3/4 to 1 inch to either side. Assemble the boards by gluing to the wings either side of the spine, leaving a small gap equal to the thickness of the bookboard between the spine and the boards. Adjust the curve of the spine if needed to approximate the textblock thickness by placing weights on the boards and allow to dry.

A simple but very nice effect can be added at this point by gluing paper cutouts to the davey board prior to covering with bookcloth, producing an embossed look. I like to glue bands across the spine to represent the cords used in medieval binding.

Photo showing cutouts glued to bookboards

Any sort of shapes can be used

Any number of shapes can be utilized to create depth. But there are limits. A bit of experimenting will help you to find the right thicknesses and shapes to use to achieve the right effect. To be successful at this bookbinding stuff, one has to dive in there and make a lot of books. Doing so will increase your knowledge of materials and methods. It will also increase your reverence for those that went before us in pioneering the art, develop your style and hone your craft to a more respectable level.

Photo showing the gluing of decorative spine bands

Gluing Decorative Spine Bands onto the formed spine.

Anybody can cobble a book together. It is the fine points and the details that set the novices apart from the true crafter. Choosing the right covering for your book is part of that experience thing. It took me a while to discover the right properties, mainly because I ignored the bookbinding suppliers at first, being mesmerized by the selection of fabrics at JoAnn’s. I used transfer adhesive to stick the fabric to the boards and they looked great! At first, it seemed the way to go because for one thing, the bb suppliers had a minimum order policy. What was I going to do with ten yards of the same material? I wanted variety, man! Besides, the dealers only had limited choices.

The fabric stores had a rainbow of colors and surfaces, and I could purchase small amounts. But as my journey continued, I began to see that my earlier books were starting to sag, looking tired and even wrinkled. I discovered that the adhesive I had used was starting to fail after about four years. This was not good. I had settled on transfer adhesive because it was not as messy as glue. Production orders could be processed in less time with no risk of damaging the books with glue on unwanted surfaces. It seemed a no-brainer.

But now I think that was a mistake. Bookcloth is designed for the purpose of covering books. It is stiffer than regular cloth and it has a coating on the back side that prevents the application of liquid glue from bleeding through to the front side. In comparing costs, I found that the cost of the transfer adhesive plus the fabric exceeded the cost of real bookcloth and liquid adhesive! (Dang! Those bookbinder guys really have it together!).

Photo of rubbing the cover with a stylus

Rubbing down the cover with a stylus to enhance the cutouts

But now I had to learn to use the liquid glue, despite the obvious drawbacks.  So I opened my mind and researched the process. To my surprise, I found it to be not so difficult and very beneficial. In fact, I kicked myself for taking four years to discover it. (Dang again!). The two main things that sold me on PVA were the much lower cost and its versatility. Once I learned to work with it I decided it was the only way to go. Here is a good tutorial on gluing by a master craftsman. In fact, I recommend watching all of his videos for dozens of good tips on bookbinding. Remember, it’s the details and fine points that set you apart from the others.

I like to have a one inch wrap margin for my covers. I start by coating the bookboards and spine with PVA using a roller. I then center the bookcloth and proceed to rub it down starting from the spine and working outward, being careful to push the cloth down into the crevices with my fingers as I go.  Once I have it fairly smooth and even, I trim the corners at 45 degrees and wrap the long sides first, taking care to burnish the surface well, and wiping off excess glue with a damp cloth. Then I crimp the corners and turn the short sides in.

Photo of burnishing leather spine

Using a bone folder to burnish bonded leather to the formed spine

Photo of Butterflies book

Paper and string beneath bonded leather bookcloth

To finish, I continue to rub and burnish the bookcloth, using a stylus and bone folder to work the surface to form around the cutouts, to produce the embossed effect. The finished cover should be placed under weights to ensure that the bookboards dry flat, due to the wet adhesive applied to only one side. Otherwise they will curl as the glue cures. Be sure that all the glue has set and the cover is dry and the boards are flat before proceeding to the final assembly.

Photo of Finished Half Leather Journal

Finished Half Leather Journal

Next time I will be covering the process of making and attaching end sheets as well as final assembly into a finished book.

I  welcome comments and any suggestions you might have for future articles. I love to talk and write about bookbinding and publishing, so hit me with some feedback!

Until next time,

Michael

DIY Writer-Bookbinder

Real do-it-yourselfers have a craving for knowledge about how things work. We aren’t satisfied accepting things “off the shelf”. We have to take them apart to see what makes them tick, and in many cases we wind up modifying or even building a better version using the knowledge gained. Once the basic principles have been learned, the true DIYer will look for ways to make it faster, cheaper, more appealing or whatever. The satisfaction gained from these journeys nourishes the creative fires and feeds the soul of these DIY creatures.

Photo of Michael Faris sitting in chair

Why not do it yourself?

A printer for more than forty years and a writer for the past twenty-five, I have always looked for ways to print and bind some of my work… in small quantities.

The digital press opened the door, at least to the printing part. Finally –an affordable way to print books. I could even print a single book if I wanted. Digital printing is the writer’s dream come true. The work comes off the press already collated and in order, just like a real book! Zowie! The only thing missing to make it actually be a book is the binding part, something I felt could do for myself.

After all, what could be so difficult about gluing a stack of paper, right?

My first perfectbinding effort using Goop silicone adhesive.

So I tried it, using some scrap paper and some silicone rubber. I placed the stack between two boards, put the sandwich in a vise and smeared some Goop on the bind edge and it worked! I was able to wrap a pretty respectable cover around it in a separate operation.

I was elated! My home-grown process worked so well that I bound my first run of my first novel that way. The process took me the most part of a day to bind five books, but they came out perfect! I had perfected perfectbinding in my garage!

Later, I learned to score the edges and scrub the glue down into the book block to penetrate and form a better bond. Later still, I bought a table top hot-glue binder that bound the cover to the edges in a single operation. However, I have to say that the hot glue holds no better than the silicone rubber did.

So now I could make my own paperbacks. Big deal!

Perfect results!


Once I got over how cool it was, I decided to try a hard cover version as it seemed to be just an extension of skills I already had developed with my paperbacks. I was sure I could do it.

And so began an adventure!

My first few efforts were laughable. They were uneven. Some of them wouldn’t stay closed, and most of them wouldn’t lie open without suffering damage to the binding. But I didn’t lose heart. I was determined to find a way to use modern materials and adhesives to produce a nice looking and durable book. I tried this and that idea, trying to emulate the common hardcover book with the tools and knowledge I had at my disposal.

You see I was tired of the look of production books, the mass-produced paperbacks and bookstore hardbacks. But by trying to ignore the old ways, I missed all the important things that traditional bookbinding could teach me! Duh!

So I started taking old books apart to see how they were constructed. I bought a few manuals on book binding and book repair and I read all the articles and watched all the video tutorials on traditional bookbinding. Then I began to see the process in a different light.

There are two major categories or methods to bind pages: flat sheets or folded signatures.

Perfectbinding flat sheets by the application of various adhesives is the most common (and cheapest) way to bind books. This binding method lends itself very well to digital printing, as there is virtually no complicated bindery tasks like folding and stitching required. Hot glue does a respectable job on uncoated paper. Additionally, holes can be punched or drilled near the bind edge for the purpose of stitching coated or glossy papers. The result of gluing and stitching is a very sturdy binding. However, stitching from the side robs a lot of margin from the gutter or bind side. Allowances in the book layout must be made for this. Also, the paper grain should run parallel to the spine to favor the book construction.

Punching Cradle

Folded signatures are stitched in any number of ways before attaching the pages to a flexible cloth backing. This is a much more durable way to bind books, but it is more time-consuming and uses more materials, because this method generally involves a hard cover or casebinding.

But the most important lessons were in the hands-on experience I got while attempting to follow the traditional methods to bind my work. I was surprised at how much easier it was to use tried and true materials… especially adhesives.

Beforehand I was convinced that modern non-water based materials were stronger and easier to use. I thought it would be more efficient to use transfer adhesives and hot glue to produce my books. But I was dumbfounded to learn how wrong I was! Those materials are more expensive and far less forgiving than using water-based liquid glues.

Home made stitching loom for Coptic stitching.

With practice, I learned how to judge how thick and wet the glue should be, how to apply it and how long I can work it before it sets up.  I learned which surface to apply it to and how to rub out all the bubbles and burnish paper to board. I have to say I am sold on PVA, a relatively modern water based glue that lends itself to traditional (and modern) bookbinding methods.

One thing I was able to do was to make many of my own tools and equipment, a truly satisfying thing that fed my inner desires to create. The more conscious I became of exactly what I was trying to create, the more comfortable and capable I felt about making it happen. I began to look at the world differently. I saw bookbinding tools in everyday items — spatulas, putty knives, tweezers, carving knives, knitting needles. I saw bookcloth in fabric prints, batiks, old blue jeans, vinyls for sign making , placemats, old maps.

I have now lost count of how many books I have bound for myself and others. But I feel like my work has improved considerably over the years. Though I built myself a couple of book looms to aid in stitching signatures, I am just as comfortable stitching a book in my lap… and stitching is a trip!

So many ways to do it! I experimented with several stitching patterns until I found a couple that suit my style and I have worked to refine my stitches so they are now looking uniform and just tight enough to hold things together.


Closeup of Coptic stitches

I will often experiment with new ideas using scrap or discarded materials. Once I get the method down, I progress to quality materials. In servicing my customers, my philosophy is to use the best  I can afford, as cheap materials are not worthy of my time.

Traditionally bound 160 page embossed casebound journal

I will be posting some more information on how writers can bind  their own books in a variety of unique and interesting ways, including some of my experiments in hot foil tooling and blind embossing.

Another journal - 320 pages. These covers are bonded leather bookcloth.

Rolling Your Own Audio Books

Photo of Michael Faris sitting in chair

Why not do it yourself?

I started checking out audio books to listen to on my mp3 player. I downloaded some free classics that I found on Librivox. These are mostly public domain books read and recorded by volunteers. Having read some of these books in the past, I had an idea of what to expect… but I was mostly disappointed.

Don’t get me wrong. I fully support their noble cause and salute their efforts to preserve literary heritage.  But there has to be better quality material available in the way of audio books.

For me, lengthy novels like Jules Verne’s 20,000 Leagues Under the Sea quickly became boring and difficult to follow. The same of shorter ones like Sir Arthur Conan Doyle’s The Adventures of Sherlock Holmes. Why was I dissatisfied? Aside from sound quality, which was rather poor to good in my opinion, there was something about the intonation or pace that I didn’t like. But hey! What can you expect for free. ..and what can a really good audio book sound like?

So I went to audible.com. Here I found much newer, popular books read by professional people. Yet I chose to purchase another classic: Jack London’s The Sea Wolf, narrated by Frank Muller. The book was over nine hours long. Sound quality was way better, and the narration was excellent.  After that I purchased Henre Charriere’s Papillon, narrated by Michael Prichard. I had seen the movie starring Steve McQueen and Dustin Hoffman, and loved the story, but the eleven-hour audio book was even better!

So what made those books better? OK, the sound was produced by professionals, people who specialize in recording quality… and it’s what you would expect. The track was all normalized, optimized, tweaked filtered and whatnot to create the best possible results using current mainstream technology. But more than that it was the narrator’s tone, inflections and perhaps the soul that he put into the reading.

True, a great storyteller needs a good story to do his thing, but the life he breathes into characters becomes the spice to the essence of the tale. His voice paints a vivid picture made more complete by his intonation. He adds character to characters. They take on more meaning just from the way he expresses the words used in dialogue and descriptive writing.

Of course, the professional audio books cost money to produce and to own. They are often subject to digital rights restrictions, which severely limits the ability to transfer them from one device to another. This is intended to prevent unauthorized downloads and free use of the material. But is it really necessary for the newbie author?

So the big guys have produced professional quality audio books by famous and popular authors selling anywhere upwards from ten to thirty dollars or more that are difficult to give away or share due to DRM. (Personally I would love for someone to steal my material and pass it all around… Heck,  make it go viral! It’s free promotion for me. I can see nothing but benefit by not using DRM. But that’s a whole different subject).

This model works for an established author with a track record. He gets great reviews and wide distribution as well as premium space in the brick and mortar bookstores. The business plan is structured so that everyone along the path of production, sales and distribution gets their cut of the proceeds from the project. Nothing really wrong with that model, except that it requires prior establishment of and considerable investment by the author.

But what about the fledgling author just starting to flex his wings? The one without the budget. And what does it mean to the writer with several published books under his belt that wants to expand into audio versions of their work? Does it really take big bucks to produce and market your own audio books? Can a person produce a good audio recording on their own?

I’m thinking that along with the flood of new technology comes a vast opportunity for creative writers. Obtaining the software and learning to record your own narrations is simple. All you need is a modest investment in a good microphone, and a computer with a sound card plus speakers. The rest depends on your ability to tell a good story.

Notice I said tell. You might believe you can write a good story, but can you tell one? Have you listened to your recorded voice? What do others say? How well does your work come across when it is narrated, rather than absorbed by looking at the printed page?

Words can only half describe the author’s real meaning. The other half comes from the subtle inflections and emphasis of the voice. An author may even feel that no one can read it like they wrote it, except maybe themselves. Punctuation and  diacritics can only go so far in describing speech. The very same printed words when spoken by different people can sound so different.

So if you can write a good story, and you can tell a good story, what’s to prevent you from making your own audio book?

In an effort to find out, I obtained a dynamic microphone and downloaded Audacity, a free program for recording and editing sound tracks. I made some tests in my relatively quiet office, laying down tracks of my voice while reading some of my material. After comparing samples made with and without the pop-filter, and testing different mike positions and volumes, I attempted to do an entire short story.

Right off the bat, I stumbled and stuttered, causing me to pause and reread portions many times. But I would stop and patiently repeat the words until they came out the way I intended for them to sound. The whole process took about an hour to lay down the raw track. However, the editing process takes a lot longer, especially if you factor in the learning curve. For me, it took approximately six hours of recording and editing to produce what I felt was an acceptable file.

Audacity is a cool program that anyone can use. It records in .wav format, which is an uncompressed file that will play on any Windows Media Player. When you open the file it is graphically represented on a timeline from left to right. Sounds are represented as groups of squiggles that form definite shapes.

Audacity Screenshot

Besides the ability to cut and paste, there are dozens of effects that can be applied to any selection. You can amplify or soften the volume, fade sections in or out, change pitch, eliminate pops and unwanted sounds, adjust the high, mid-range and low tones and take advantage of many other professional features to edit the sound.

I archived my edited track as a wav. file and saved often as I progressed. When finished, I was able to import the file to mp3 and transfer it to my portable player.

Now I was excited. I invited my wife to go for a ride with me in my pickup truck. (She had no idea!)

I casually plugged the player into the deck and turned the unit on. I kept glancing over at her as the piece began, watching her reaction.

She sat there looking out the window, not really paying attention at first, but as it soaked in, she cocked her head and stared at me in amazement. “Hey! That’s you!”

We both burst out laughing. It sounded pretty good. Not bad for a novice.

So my next questions are: Why do you need to hire out this service? What is it about the process that you cannot do yourself? It would seem that pushing your art to the next level would be an inviting challenge, worthy of your creative abilities as a spinner of great yarns.

So for an online test, I have recorded one of my poems – Completely Stumped by Michael A. Faris. How does it sound to you?

I’d like to hear from some other folks that have tried this. Let me know your experiences and conclusions. I especially want to know how indie authors view DRM.

Until next week,

Michael Faris

The Author’s Hat

Photo of Michael Faris wearing a hat

Everybody's hat is different

“Cowboys and outlaws, 

Right guys and southpaws,

Good dogs and all kinds of cats. 

Dirt roads and white lines,

All kinds of stop signs,

But I’ll stay right here where I’m at… 

‘Cause I wear my own kind of hat.”

–Merle Haggard

Merle said it with the song “My Own Kind of Hat”. It speaks loudly of the desire for indie authors to create their own brand, regardless of how the literary world has elected to categorize them.

Writers want to stand out from the rest, to be seen as unique artists in their own right, presenting work in their own style. Few authors today will place themselves firmly into any one genre. Doing so tends to associate their work with other “genre branded” authors. It means their work is stereotyped. Tagged. Pigeonholed.

We conjure all kinds of preconceptions when we have a label applied to anything. Our experience with classifying things teaches us to expect certain behavior when we encounter similarly labeled  products. Associating a label with specific traits subconsciously embeds this information in our minds. This conception is tempered by an individual’s unique experiences associated with the label. This alone is enough to give everyone a totally different slant on any given category.

Some things are indelibly woven into our concepts. For instance, if you see two men with guns facing each other in the street. One is wearing a white hat, the other a black one. What things come to mind? Most of us think of a good guy about to duel with a bad guy. Why? Because it was hammered into us from the time we watched that first episode of Gunsmoke. Good or bad, you can tell by the color of the hat.

Attempts to define specific genres suffer the same drawbacks as any classification system. They specifically include some things while excluding others, and so it becomes necessary to understand the limits of the system you are using in order to appreciate how to best utilize it.

An author might try to qualify their work by adding a note that further defines it, but the truth is that genre classifications tend to blend into each other at the edges, making it difficult to pin some types of work down.  In any case, aligning oneself with a generic or general classification could result in an unfavorable brand that limits the scope of your work.

Plato started this genre stuff, and Aristotle elaborated on it. Down through the ages, others have massaged the concept and expounded and debated the subject until it has mushroomed into a complex set of loosely defined definitions that cannot be agreed upon by anyone… completely, that is. Some authors have been driven to try spanning two or more genres in an effort to categorize their work, but this angle might serve to cloud their image even more.

Just as there are the crossover musicians which appeal to a broader cross-section of fans with individual tastes, so there must be authors with the same kind of charisma, ready and willing to cross the lines and make their work available to a wider and more varied audience. Branding yourself as a “one-size-fits-all”  kind of writer might tend to dilute your image. I don’t believe there are any genre police going after authors inventing their own classifications, but I expect there are penalties.

To play ball with the big guys, you have to first learn their game. If you are working through an agent or otherwise publishing traditionally, this means you will need to discover the genre that best fits your work. The reason is that there are already institutions, campaigns and tried methods in place that are geared to marketing these predetermined broad-class genres. In order to fit, you may need to… conform (ouch!)

But if you are truly an indie, you won’t be encumbered by traditional rules. You will bravely stick to your course and hope that your social media effort will gain enough followers to see you through. You will realize that there is a much bigger audience out there if you don’t confine yourself to any one genre. But one thing is certain. It is difficult for readers to make any kind of judgement about your work unless they can either compare it to something familiar or experience it firsthand.

Try to connect with and appeal to folks that have similar likes and preferences. .. those with their own kind of hat.

Do you have some thoughts about assigning a specific genre to your work? I’d like to hear how some other indie writers out there seeing this problem and what they are doing to avoid it… or maybe they totally disagree. What do you think? Let’s hear your side.

Michael Faris

About Time Publishing

Sources:

http://en.wikipedia.org/wiki/Genre

http://www.bubblecow.net/a-list-of-book-genres

http://homeworktips.about.com/od/booksbytopic/a/genres.htm

Author’s Brainstorming Tool

Mike riding backwards on bicycle

As I mentioned in yesterday’s post, I have difficulty defining and sticking to a plot when writing fiction. I’ve tried outlining everything on paper. I’ve tried index cards. I’ve experimented with different text programs and even full-blown page layout systems in an effort to arrange my thoughts before sitting down to actually write.

I usually keep a notebook for each writing project where I stuff all my outlines, notes and so forth. It works better than my former method of leaving these things scattered in, on, around and even under my desk. Some notes don’t even make it out of the bathroom, or perhaps it fell down between the seats in my truck when I scribbled the thought on a McDonald’s napkin while sitting at a traffic light. I try to discipline myself to at least try to get my doodles into the notebook.

My point is that an idea will occur at the strangest moment, sparked by just about anything. If I don’t write it down somewhere it will surely fade into oblivion in only a short time. At best, I can only remember that I had a great idea a while ago, but the substance often eludes me.

Of course, just having ideas is nothing if no action is taken. So many times I have come up with a half-baked thought that really only needed more cooking time to become a good idea with some merit. I just need to brainstorm about it, or perhaps seek some advice… if I can just hold on to it… maybe park it somewhere until I can focus.

Well today I came across some software that might help  to organize my thoughts in a simple, easy-to-use format. I can carry it with me on my thumbdrive and work on it anyplace I can plug into a computer.

Idea Cruncher is meant to help you manage any project, but it is really super for writing books. Its simple interface is intuitive and easy to learn. You input data at anytime and anywhere within an outline that is very flexible. Information is graphically displayed as a tree. You can drag the order around, jot notes on any of the ideas and arrange parent and child data as needed. You can save versions and even import and export information between Idea Cruncher documents.

For managing projects, you can flesh out the the outline with more detailed information by adding notes to each point. Any of the outline entries can be tagged as actions, which can be displayed in a separate list of all actions contained within the entire document. You can check off points of the list, which draws a line through the text, just as you might do on a paper list.

There is a third window on the bottom that can be used to make text drafts before moving the information to your favorite word processing program. This is a scratch area that holds anything recorded there no matter which parts of the outline you are displaying above.

I downloaded a 30-day  trial version onto my laptop and was using it productively in just a few minutes. The registered version is less than $15 and includes the portable (thumbdrive) version. Sweet!

Michael Faris

About Time Publishing

DIY Bookbinding -The Sticky Stuff

Photo of finished hardcover book

DIYcrafters generally have quite an arsenal of materials and supplies in their workshops. Over time they develop a loyalty to certain products, and for good reasons. Their use of a particular tool or material has been positive. The limits of the thing have been explored and experienced. Familiarity breeds confidence in their ability to make these things work for them. Over time these products help you settle in to your comfortable crafting zone.

I can really appreciate the effort and craftsmanship that goes into making traditional hardcover books. The rather lengthy and cumbersome process can yield a beautiful and durable work of art. But this old-world craft is fading in favor of new processes and materials. There are newer fangled (Did I say fangled?) materials out there that open up many new facets for the creative. There are also a lot of new tools and processes that will enhance the home bookbinder’s craft.

Bookbinding is a sticky proposition. Unless your books are spiral or otherwise mechanically bound, at some point you will have to deal with adhesives.

One of the things that bothered me about traditional bookbinding was the lengthy times that it took for the glue to dry. Polyvinyl acetate is one of the bookbinder’s staples. PVA is great stuff, and sometimes it is the only thing that will work in a given situation, such as repairing older books. But working with PVA for any volume of books is too slow.

PVA is similar in consistency to Elmer’s glue. You have to apply it in a thin coat to the surface of various materials, and then hold them together under pressure until the adhesive has set. Learning to use PVA can be challenging and requires some practice in order to reach that comfortable crafting zone mentioned above. Slow-curing adhesives tie up equipment for lengthy times. (By the way, Elmer’s is not a good substitute for PVA as it dries brittle and yellows with age).

Most do-it-yourselfers know that anything worth their time should be constructed using the best materials. No one likes to have their project fall apart in a short time because of shoddy fabrics or workmanship. If you want to be proud of your work, then you should subscribe to the philosophy that it should be done well with the best materials you can afford.

So what constitutes “best” materials when it comes to bookbinding? Aside from using acid-free papers designed and manufactured to last, bookbinders need to use adhesives that will not break down over time and under use. In trying to find the right adhesive, keep an open mind. Look to other industries such as aerospace or building. Companies specializing in industrial finishes have all sorts of products that can lend themselves to the DIY bookbinder.

For instance, I use a transfer adhesive designed for the outdoor sign industry for many of my bookbinding operations. It is fairly inexpensive and easy to use. It is also very sticky. This thin, opaque white adhesive  comes in a 38″ wide roll that can be cut into any size sheets as needed. It comes mounted on a waxy substrate that  peels off after application. Once the other surface is carefully mated into position, a light rubbing to smooth out any bubbles is all that is needed. Of course I always give it additional treatment with a smooth brayer-roller, and sometimes even send it through my desktop pouch laminator (without the pouch) to apply even pressure for additional measure. Once stuck, it is permanent in most paper-to-paper applications.

If I need a stronger bond, I will usually use contact cement. The water based (less toxic) version will work, but the solvent based works better. Either one requires that a coating be applied to both surfaces and allowed to set until it becomes tacky before pressing the two surfaces together. This stuff is faster to use than PVC glue, but it has its obvious disadvantages. It certainly doesn’t belong in a production environment if only because of safety considerations.

Spray mounting adhesives come in many flavors designed for all kinds of uses. Their main advantage is that they are ready to use right off the shelf. Simply shake and spray… well, almost. You have to deal with the chance of overspray onto places and things that you don’t want to be glued. You need a good supply of masking materials, newspapers and so forth, and a way to dispose of them. Other disadvantages include clogging nozzles that either splatter the contents in unsightly globs or refuse to work at all. This frustrating behavior occurs when the can is still 3/4 full and you have a deadline to meet. Oh, and did I mention you need to be fairly good at spray-painting in order to get a nice even coating? Still, one can develop a mastery of using spray adhesives. It is just like any other aspect of crafting anything. You have to do it a lot to become proficient at it.

I mentioned using Goop in a previous post. Goop is one of those products that is packaged for many purposes, including shoe repairs and weather caulking. It is basically a silicone sealer. This clear substance comes out of the tube about the consistency of honey. Silicone smells almost like vinegar and is very flammable in its liquid state. It cures to a flexible rubber-like consistency that bonds well to paper. Before I finally broke down and invested several thousand dollars in perfectbinding equipment, I used Goop to bind my first books.

Modern industry and scientific research developed many adhesives (like super glue and hot glue) that have found their way into my shop.  Since I bind books for other people, I try to thoroughly test a given product before I try to sell work made with it. Many of my experiments are gathering dust in a back room. Some were immediately disappointing, others await the test of time in order to determine their suitability. But in all cases, experimentation has made me a better craftsman. Thomas A. Edison said “I have not failed. I’ve just found 10,000 ways that won’t work.”

During my own 10,000 experiments I have actually uncovered a few methods and materials that work quite well. These things go into my quiver of bookbinding arrows. They become tools for specific purposes because I can depend on the results… straight and to the point.

I will be posting more tips about practical DIY bookbinding.

photo of Michael Faris on the river

Michael Faris

About Time Publishing

Read more:

http://www.brainyquote.com/quotes/authors/t/thomas_a_edison.html#ixzz1ld1J76wz

http://www.dkgroup.com/downloads/18_Film_PS.Mounting.Adhesives.pdf

http://www.ehow.com/info_7785553_3m-spray-adhesive-strongest.html

http://www.ehow.com/how_2069585_spray-mount-photograph.html

Self Publishing’s Biggest Hurdle

Photo of Michael Faris - About Time Publishing

Michael Faris

So you hear about this great book that you simply gotta have. What do you do?

Most folks go online to Amazon and do a quick search. Payment is by credit card and the item is either shipped or made available for download. Simple and effective. Customer gets product and seller gets paid.

This seems like a very efficient system on the surface. But is it really?

Why did the consumer even want to buy this book? Was it something that Amazon did? Is the fact that they were able to find the book listed at Amazon have anything to do with promoting the merchandise?

I have an idea that building a demand for your work is the biggest chunk of a successful author’s marketing plan. It is far more important than developing distribution systems, because if there is no demand for the product, then there will be no sales. In fact, it could become a drag because of associated costs, such as inventory or membership or listing fees. Distribution arrangements must be managed, which takes valuable time. Further, you could be subject to restrictions that could compromise your flexibility when it comes to setting prices and selling in other venues.

I’m not saying that that you don’t need a way to distribute your products. But I am raising a few questions:

  • Is a big worldwide distribution channel really necessary for your work?
  • Does an author need to share revenue by way of sales commissions to a distributor?
  • Are there other potentially more profitable ways to set up a supply chain?

True, dyed-in-the-wool DIYers thrill at the chance to produce something through their own ingenuity. To create a work of art is a beautiful thing. To be able to sell it is even better than beautiful! But sometimes production costs for small quantities of quality goods leaves no margin for profit when you go to sell it. That’s why it is important to examine every aspect of your plan to market your work.

Since profit equals the selling price minus the costs ( production + distribution), it would stand to reason that anything that can be done to reduce the cost will increase the profit. This goes for anything that influences these costs.

I will be covering some ideas about shaving the cost of producing and marketing books for writers and self-publishers in later posts. I invite feedback and suggestions. What are some of the best ways a fledgling author can promote and distribute their work.

I would like to leave you with some food for thought:

Search engines can find just about anything, including the distributor of your books… even if the only distributor is You!

Michael Faris

About Time Publishing

Do It Yourself Hardcover Bookbinding

photo of Michael Faris

Michael Faris - About Time Publishing

The first time I tried to bind my own hardcover book was after I had written three novels. I wanted a very special edition to give to my friends and family. So I started looking at hardcovers to try to decipher their anatomy. I started dissecting garage sale books. Any old books. They all held secrets as to their construction.

I went online and even purchased a few handbooks on the subject. It didn’t seem too difficult. There was loads of information out there, YouTube tutorials and so forth. Supplies could be purchased at the UO Duckstore. It seemed easy, and it was! All it really takes is careful planning, patience and imagination to make very unique custom hardcovers that will rival the production line models.

Understanding the mechanics of the hardcover is important. Besides the book block, (which is basically perfectbound using a short ‘saddle’ instead of a wrapped cover), you will need Daveyboard, some heavy weight paper, transfer adhesive or permanent spray-mount, and a substrate to act as the wrapper. The wrapper can be almost anything from cotton prints to wallpaper, to grandma’s apron… in short, anything that is thin and flexible.  I chose Navy-colored muslin from the fabric store for my first project.

Hardcover books have several components, the most obvious being the front and back and the spine. These elements overhang the book block by a small amount. I determined that the faces should be cut to the same width as the book block and approximately 3/8″ taller. The spine width is determined by the thickness of the book block plus two thicknesses of Daveyboard. The boards are placed with a 3/8″ space between the spine and each face.

Diagram of hardcover wrapper for DIY bookbinding

Make a drawing on paper to determine sizes and position of everything. Coat the backside of the cover wrapper with adhesive and place the boards using the drawing on a light table to determine exact position. Wrap the long side first and stick it to the daveyboard. Crimp the corners before wrapping the short sides.

Diagram showing how to crimp corners for DIY hardcover bookbinding

It is important to crimp the corners after wrapping the long sides. The short sides will now fold neatly.

Diagram of finished corner for DIY bookbinding

A little practice at cutting and wrapping will yield nice, neat corners like this.

The bookblock is prepared in a similar way to making a paperback (see yesterday’s post), the exception being that there are two endsheets and a saddle of muslin or some other material instead of a paper cover. Endsheets are made by folding larger sheets of either a similar or complimentary substance paper in half. Endsheets go in front and back of the book to assist in attaching the cover. Clamp the entire sandwich between boards as before, and apply glue. Work the adhesive well into the spine, being sure that it sticks to both end sheets.

Diagram showing how to make endsheets for DIY hardcover bookbinding

Diagram showing the relationship of the endsheets to the text pages.

Before the glue sets, apply a ‘saddle’ cut to about 4″ + spine width and about the same height as the pages. Work the saddle down into the glue and let it cure. Ask your printer to trim the three sides for you, leaving the spine intact.

Diagram showing a saddle used to attach the hardcover - DIY Bookbinding.

Photo of finished bookblock with endsheets and saddle before attaching to the hardcover blank.

Finished bookblock with endsheets and saddle before attaching to the hardcover blank.

Apply adhesive to the outsides of the two endsheets and both sides of the saddle so that it will stick to the cover blank and the endsheet. Lay the cover blank out flat and carefully locate the spine of the bookblock onto the inside spine of the cover, being careful to center it.  Then, holding the bookblock upright carefully with one hand, swing the front cover up and into position. Squeeze it against the bookblock and do the same with the back. Place the entire book under pressure and allow everything to cure.

Photo of attaching bookblock to the hardcover DIY bookbinding

Attaching the bookblock to the hardcover. In this case I used transfer adhesive. After aligning the pages, the waxed backing is peeled from the endsheets. This method is simpler and requires no masking the way spray adhesives do.

Don’t be disappointed if this first effort isn’t perfect. Mine wasn’t. My next few were much better… not bad, in fact. But only after building dozens of books did I produce what I would call a professional product. It isn’t hard. Just takes practice.As you attempt to improve your craft, don’t be afraid to experiment. There are all kinds of adhesives and materials available that were either designed for or can be adapted to bookbinding. Use your imagination! Upcycling packing materials or scraps from another project is a great way to make unique books. Try your hand at rebinding old books or just scrap paper.

Next time I will talk about the different materials I have tried, together with some suggestions about other ways to improve your bookbinding craft.

Michael Faris

About Time Publishing

http://www.judeco.net